Just got myself a 3D Printer (Elegoo Centauri Carbon) so I thought I’d start a thread where people can show/share what they’re printing for bikes
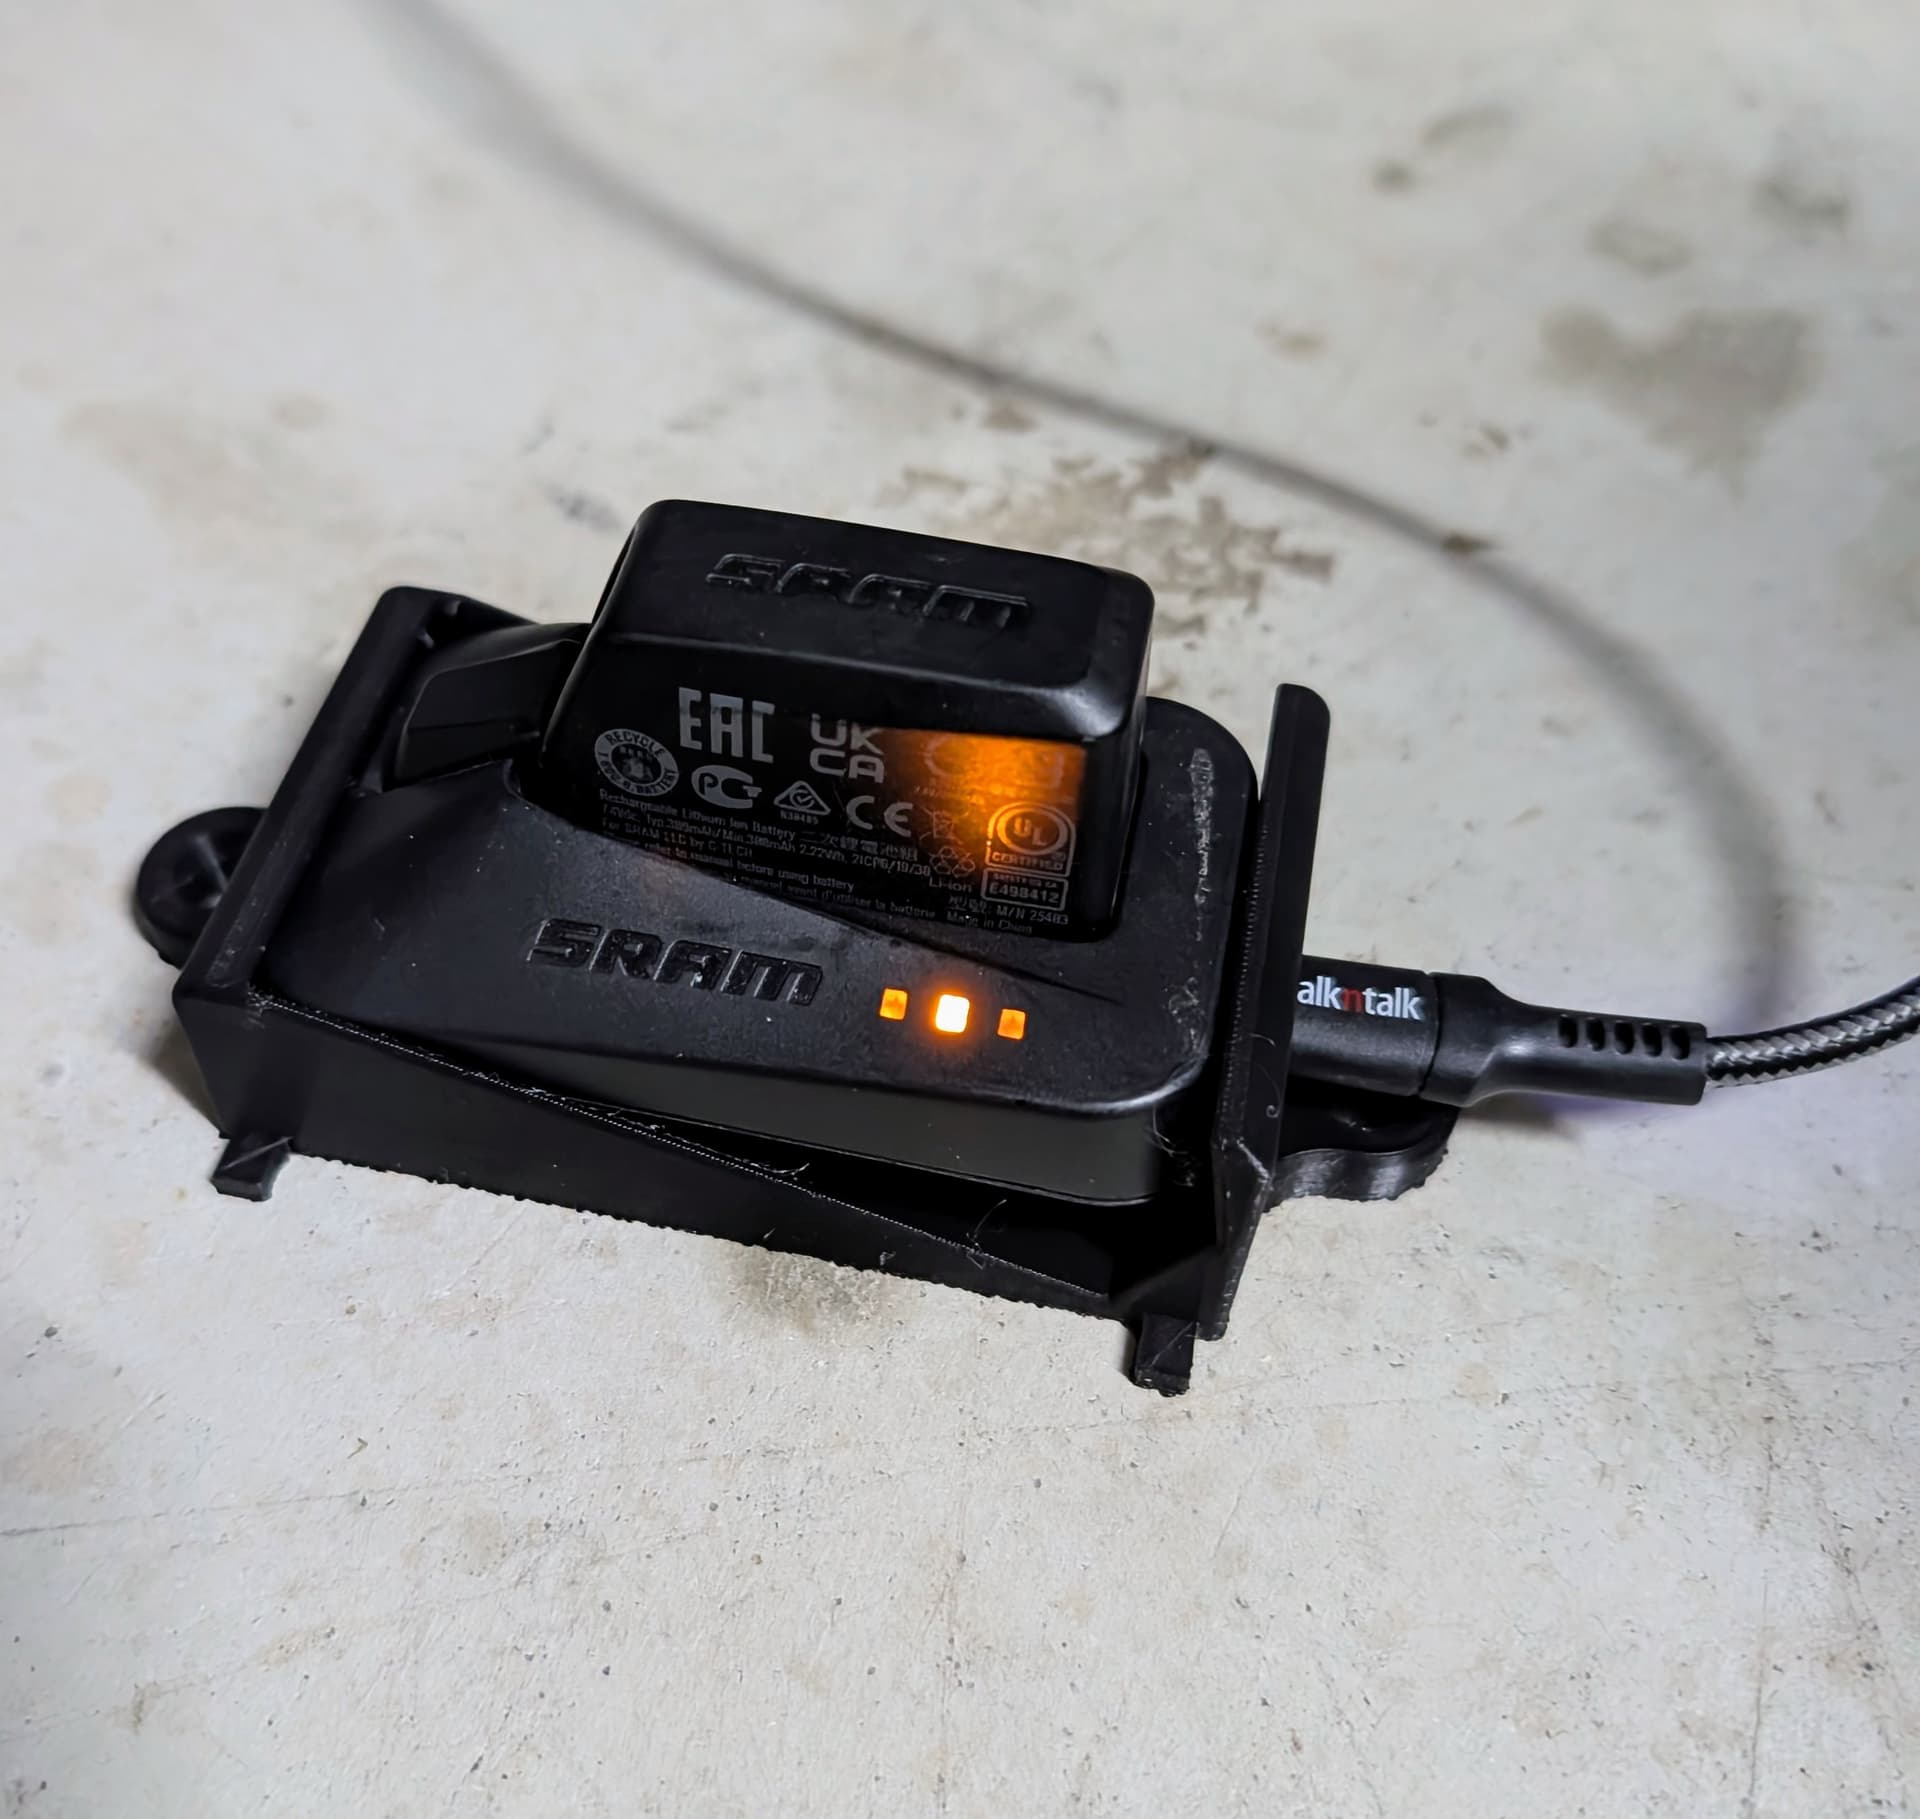
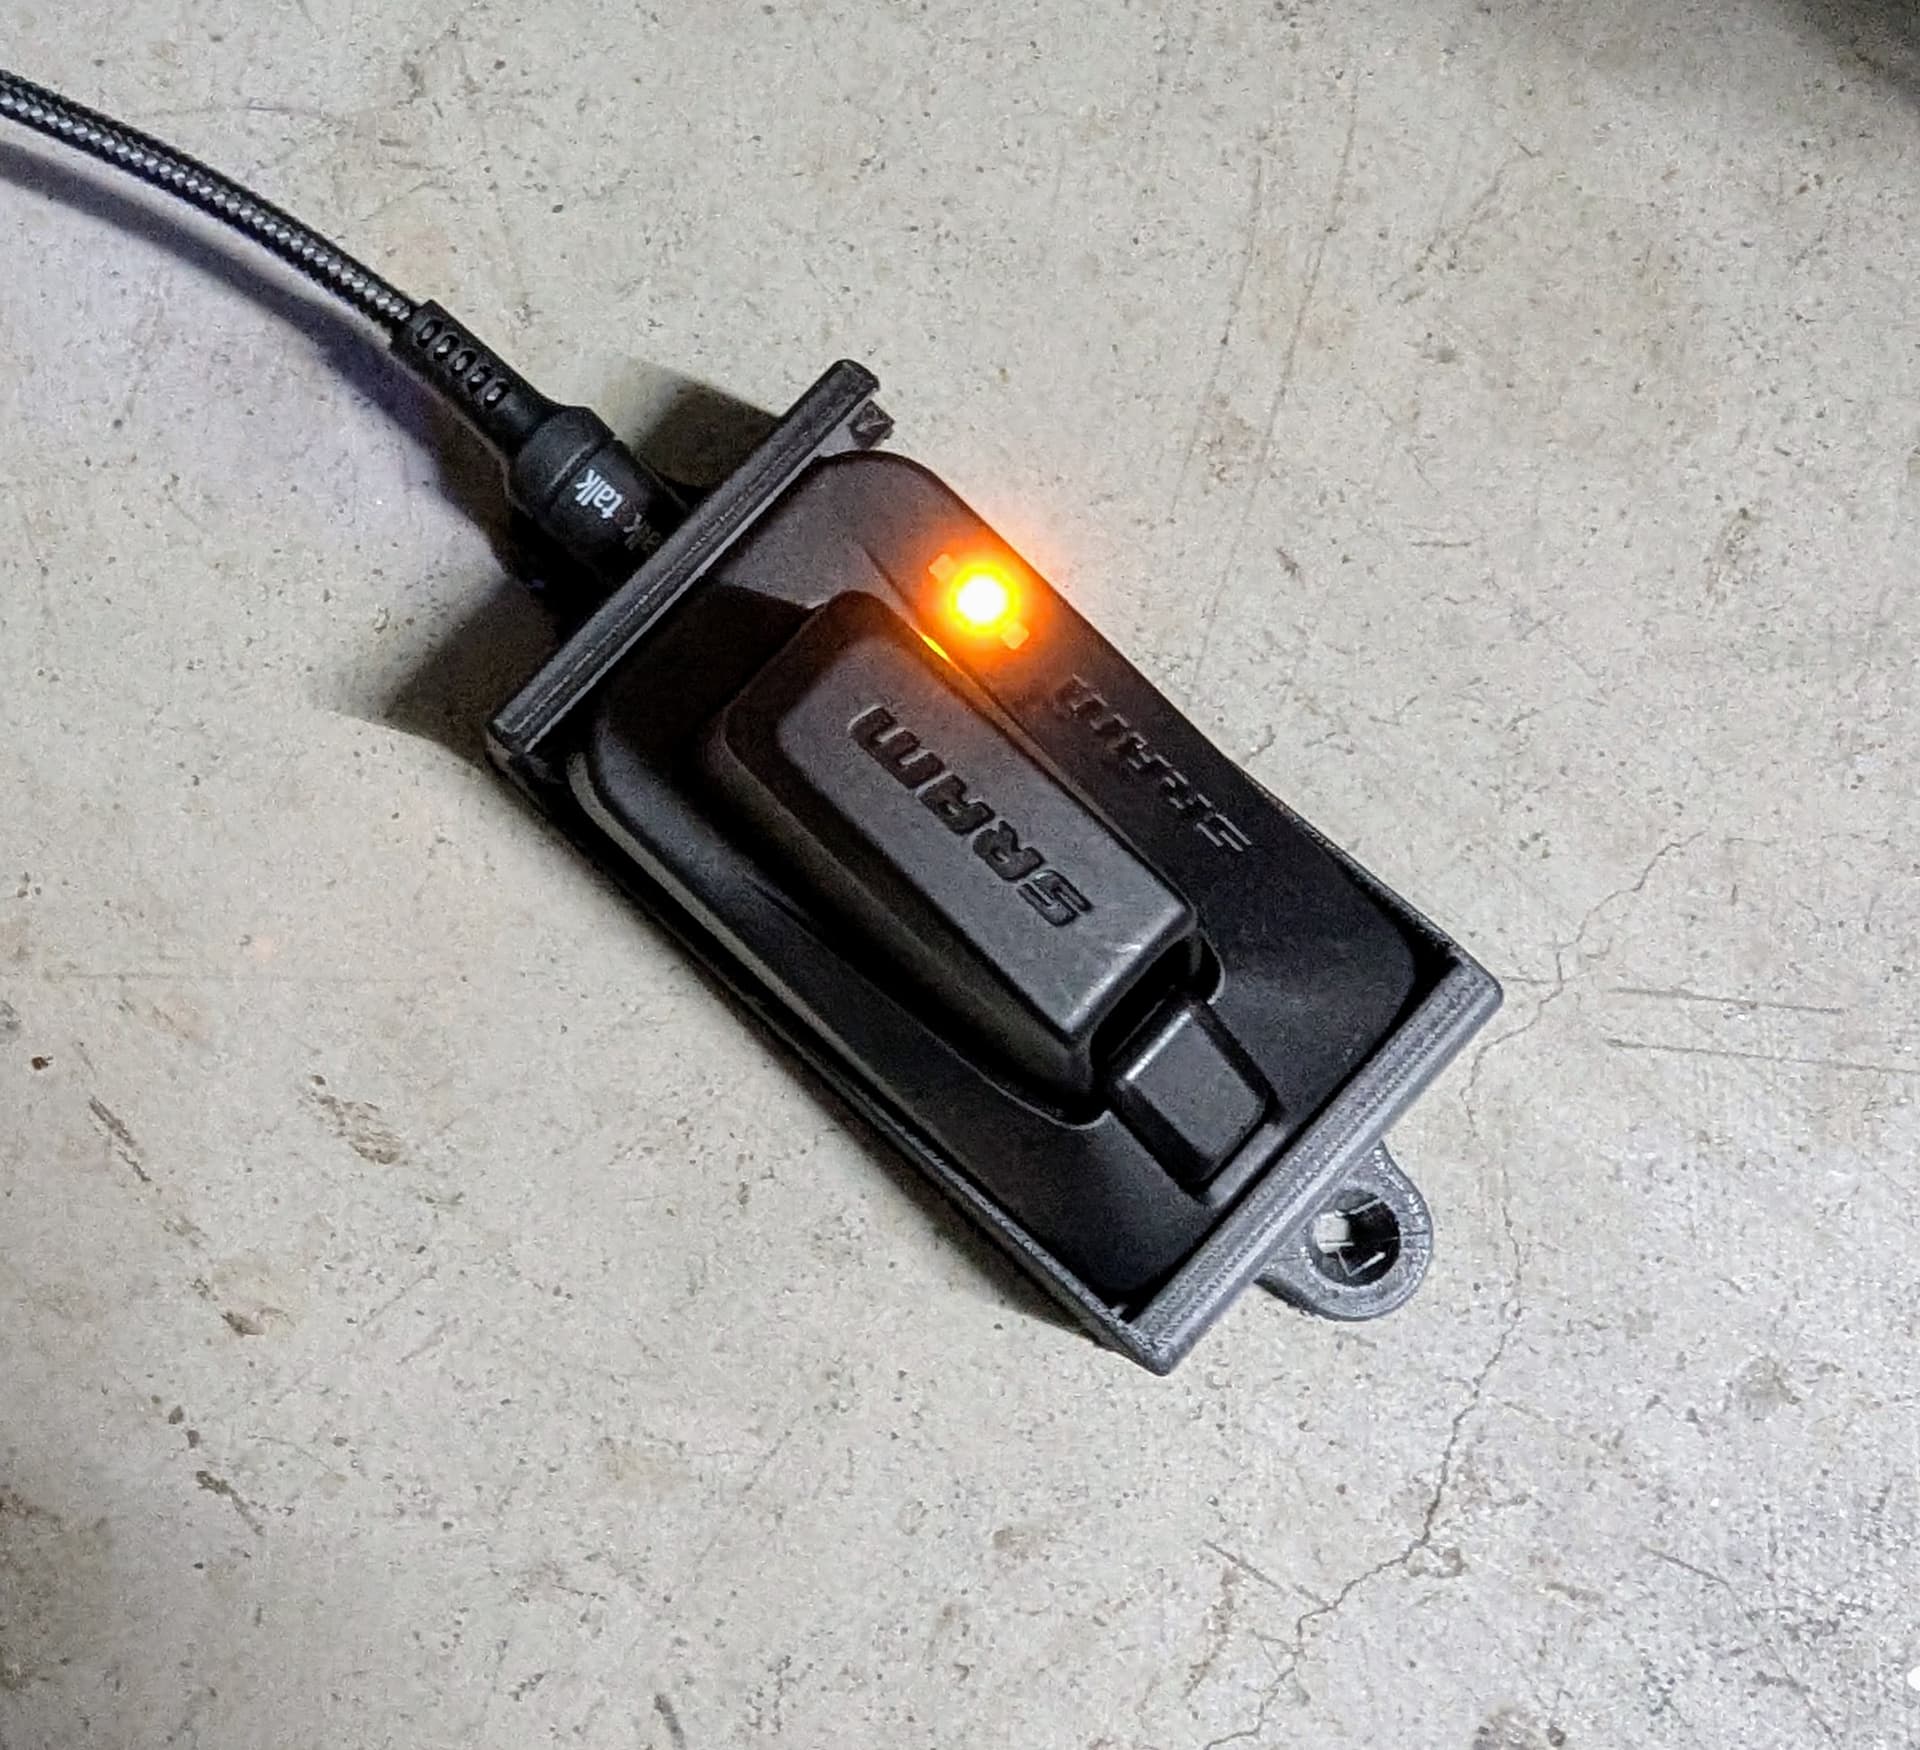
Here’s my first bike related print:
I will probably print another one since I have a few etap chargers. Will probably look into modifying the design to fit on an ikea skadis pegboard if I go down that route
10 Likes
I don’t have a 3D printer - but I’m looking for a part that probably needs printing.
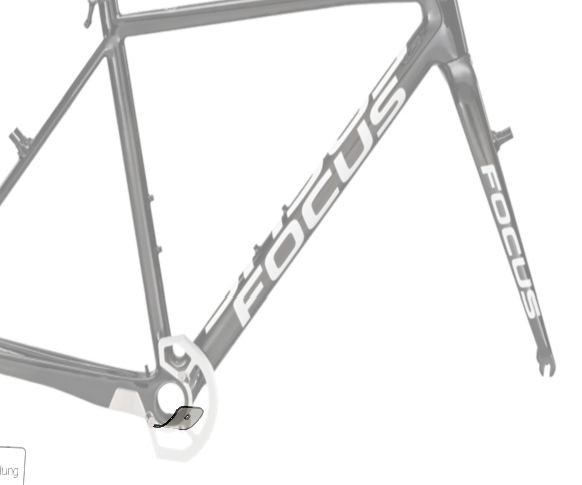
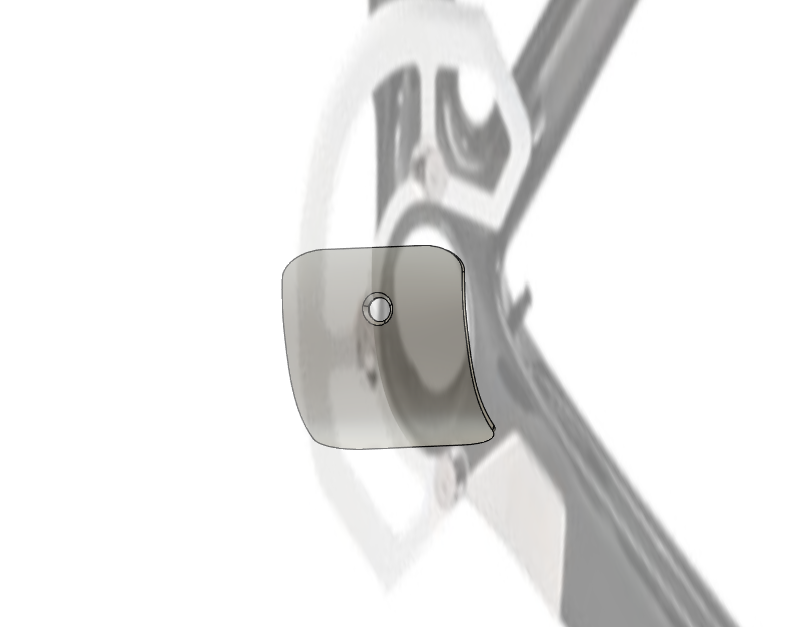
I have a Focus Mares 2017 - the bottom bracket area has a removable cover to access cable routing. Except when I bought my bike second hand, it didn’t have the cover. So, I’m wondering if I can print a replacement.
The tricky thing would be getting the curvature right. It would help to have a part to model from. Anybody seen or have one like this?
Ideally you would use a 3D scanner to make the part, but the issue is always finding somewhere that does 3D scanning
Right, yeah. A piece of plastic bottle and silicone around the edge worked for a muddy race yesterday. I guess I can refine piece that way for the time being.
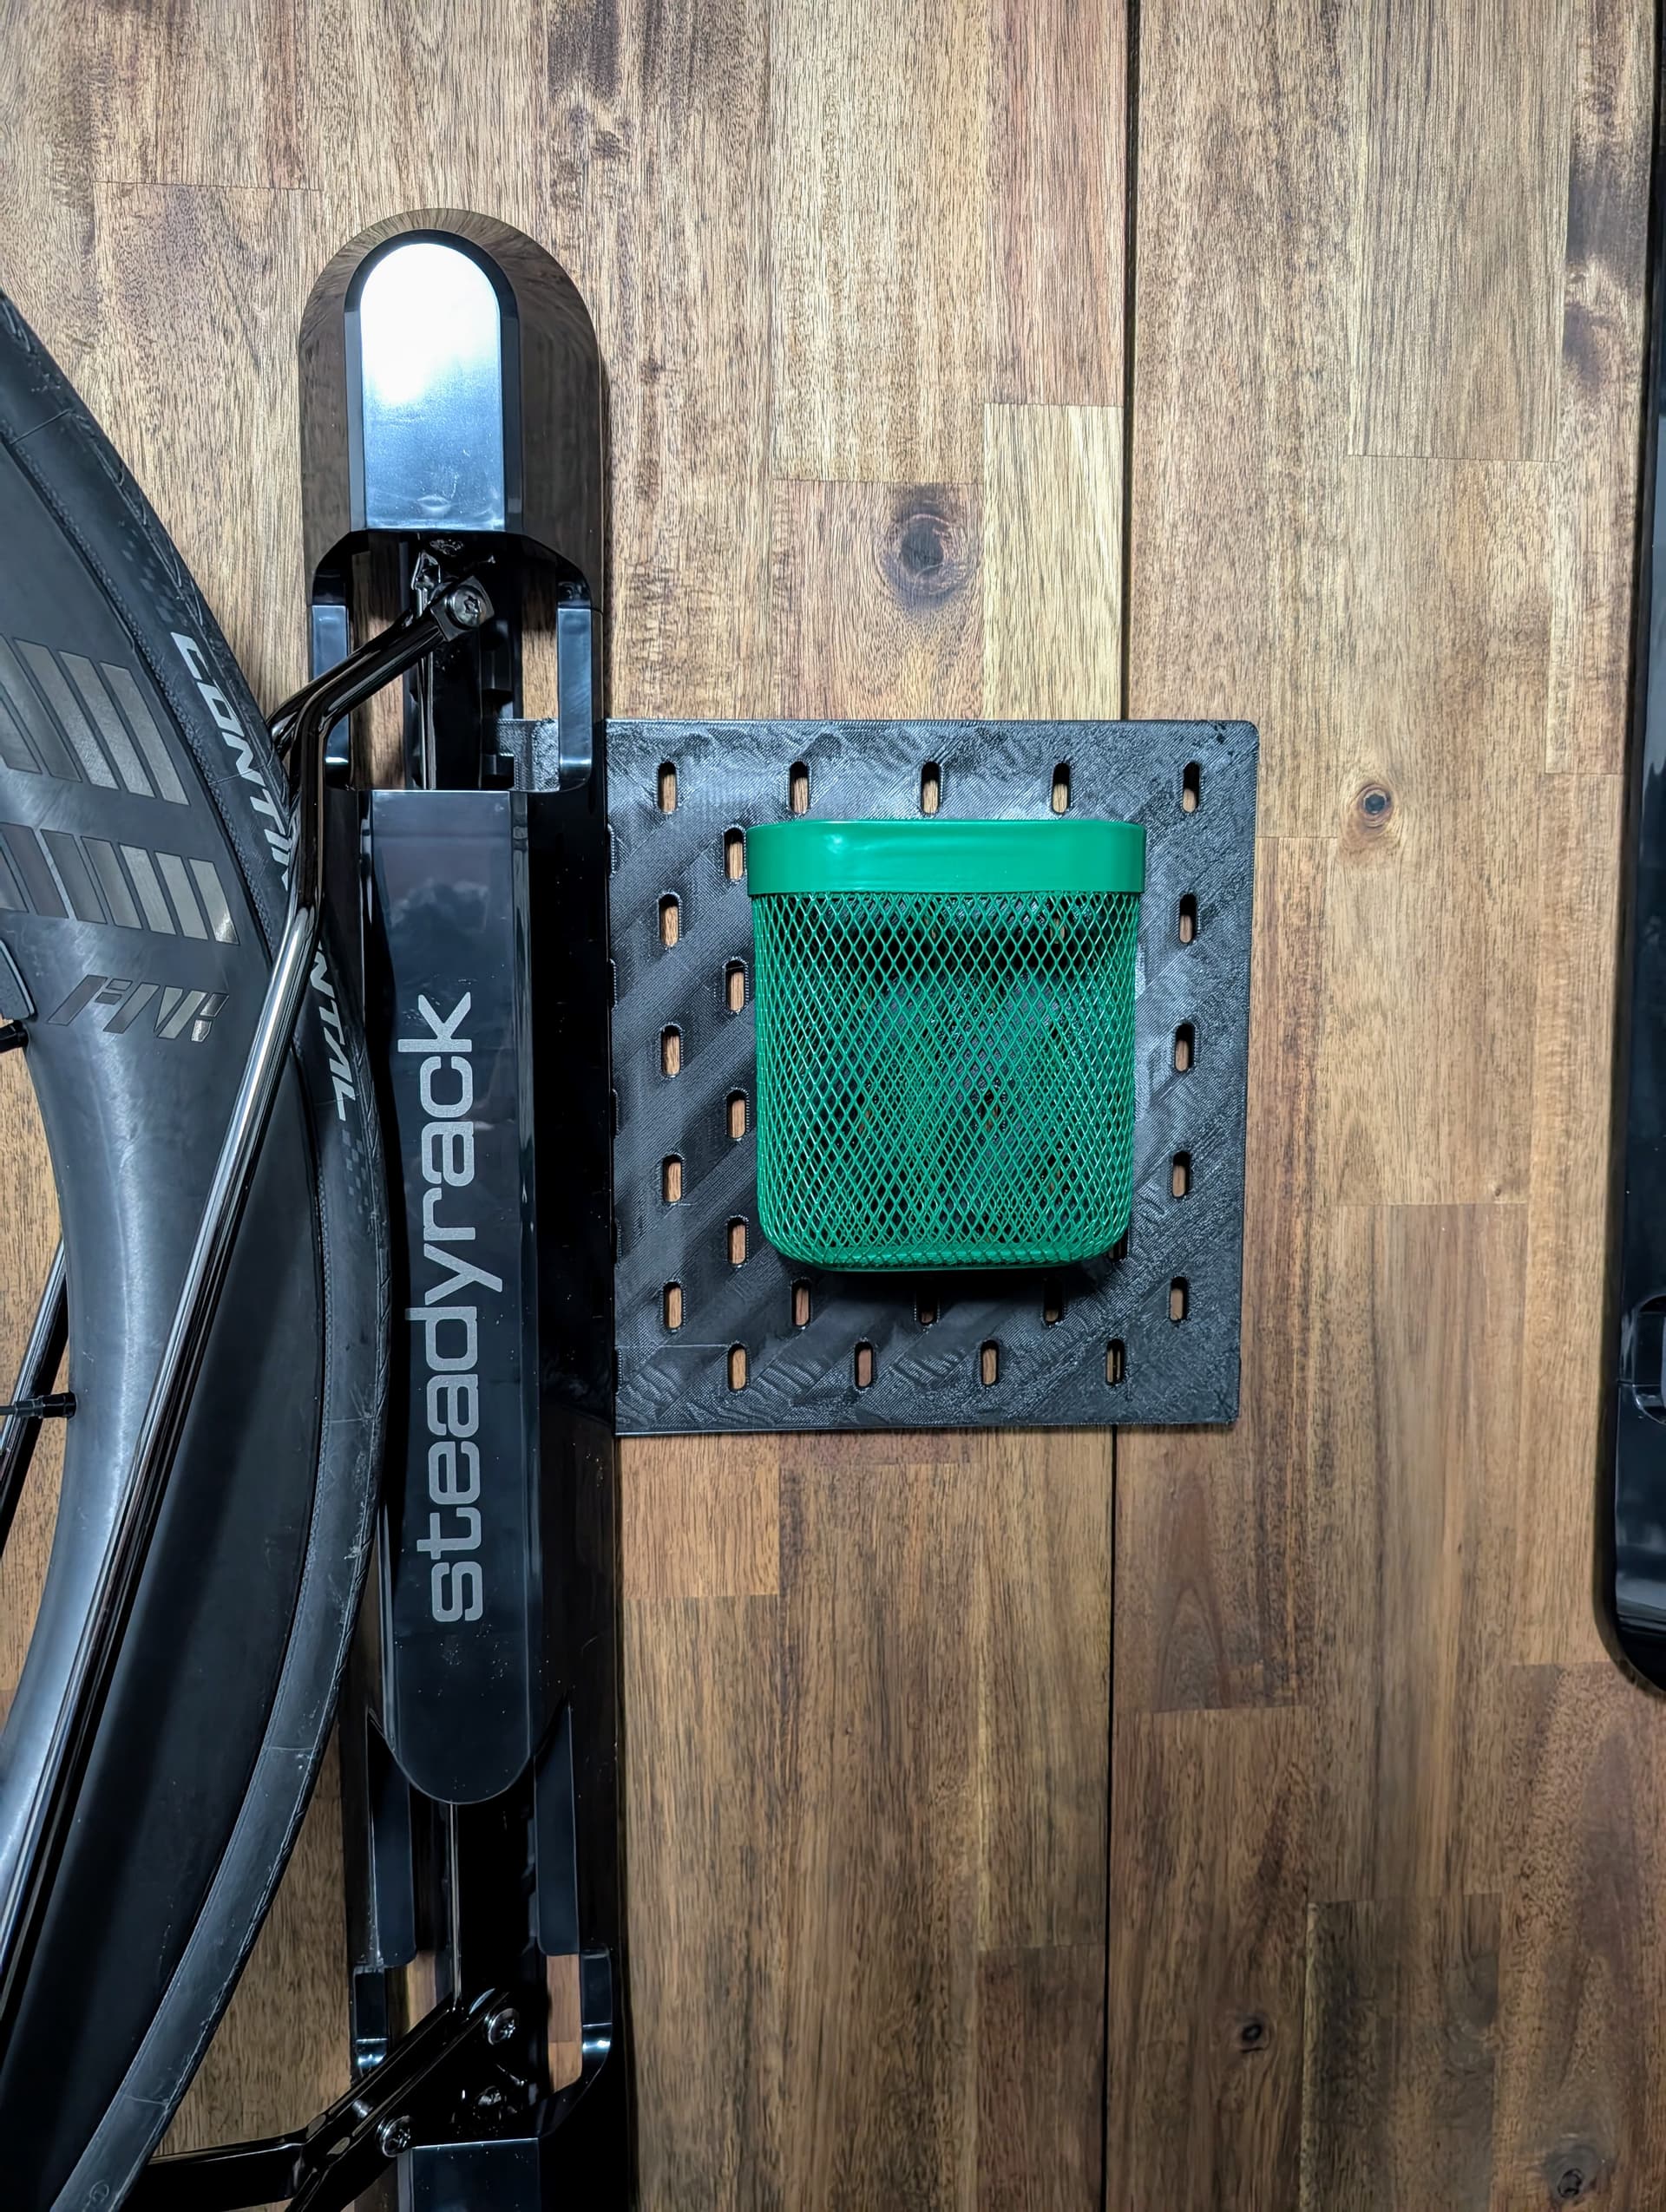
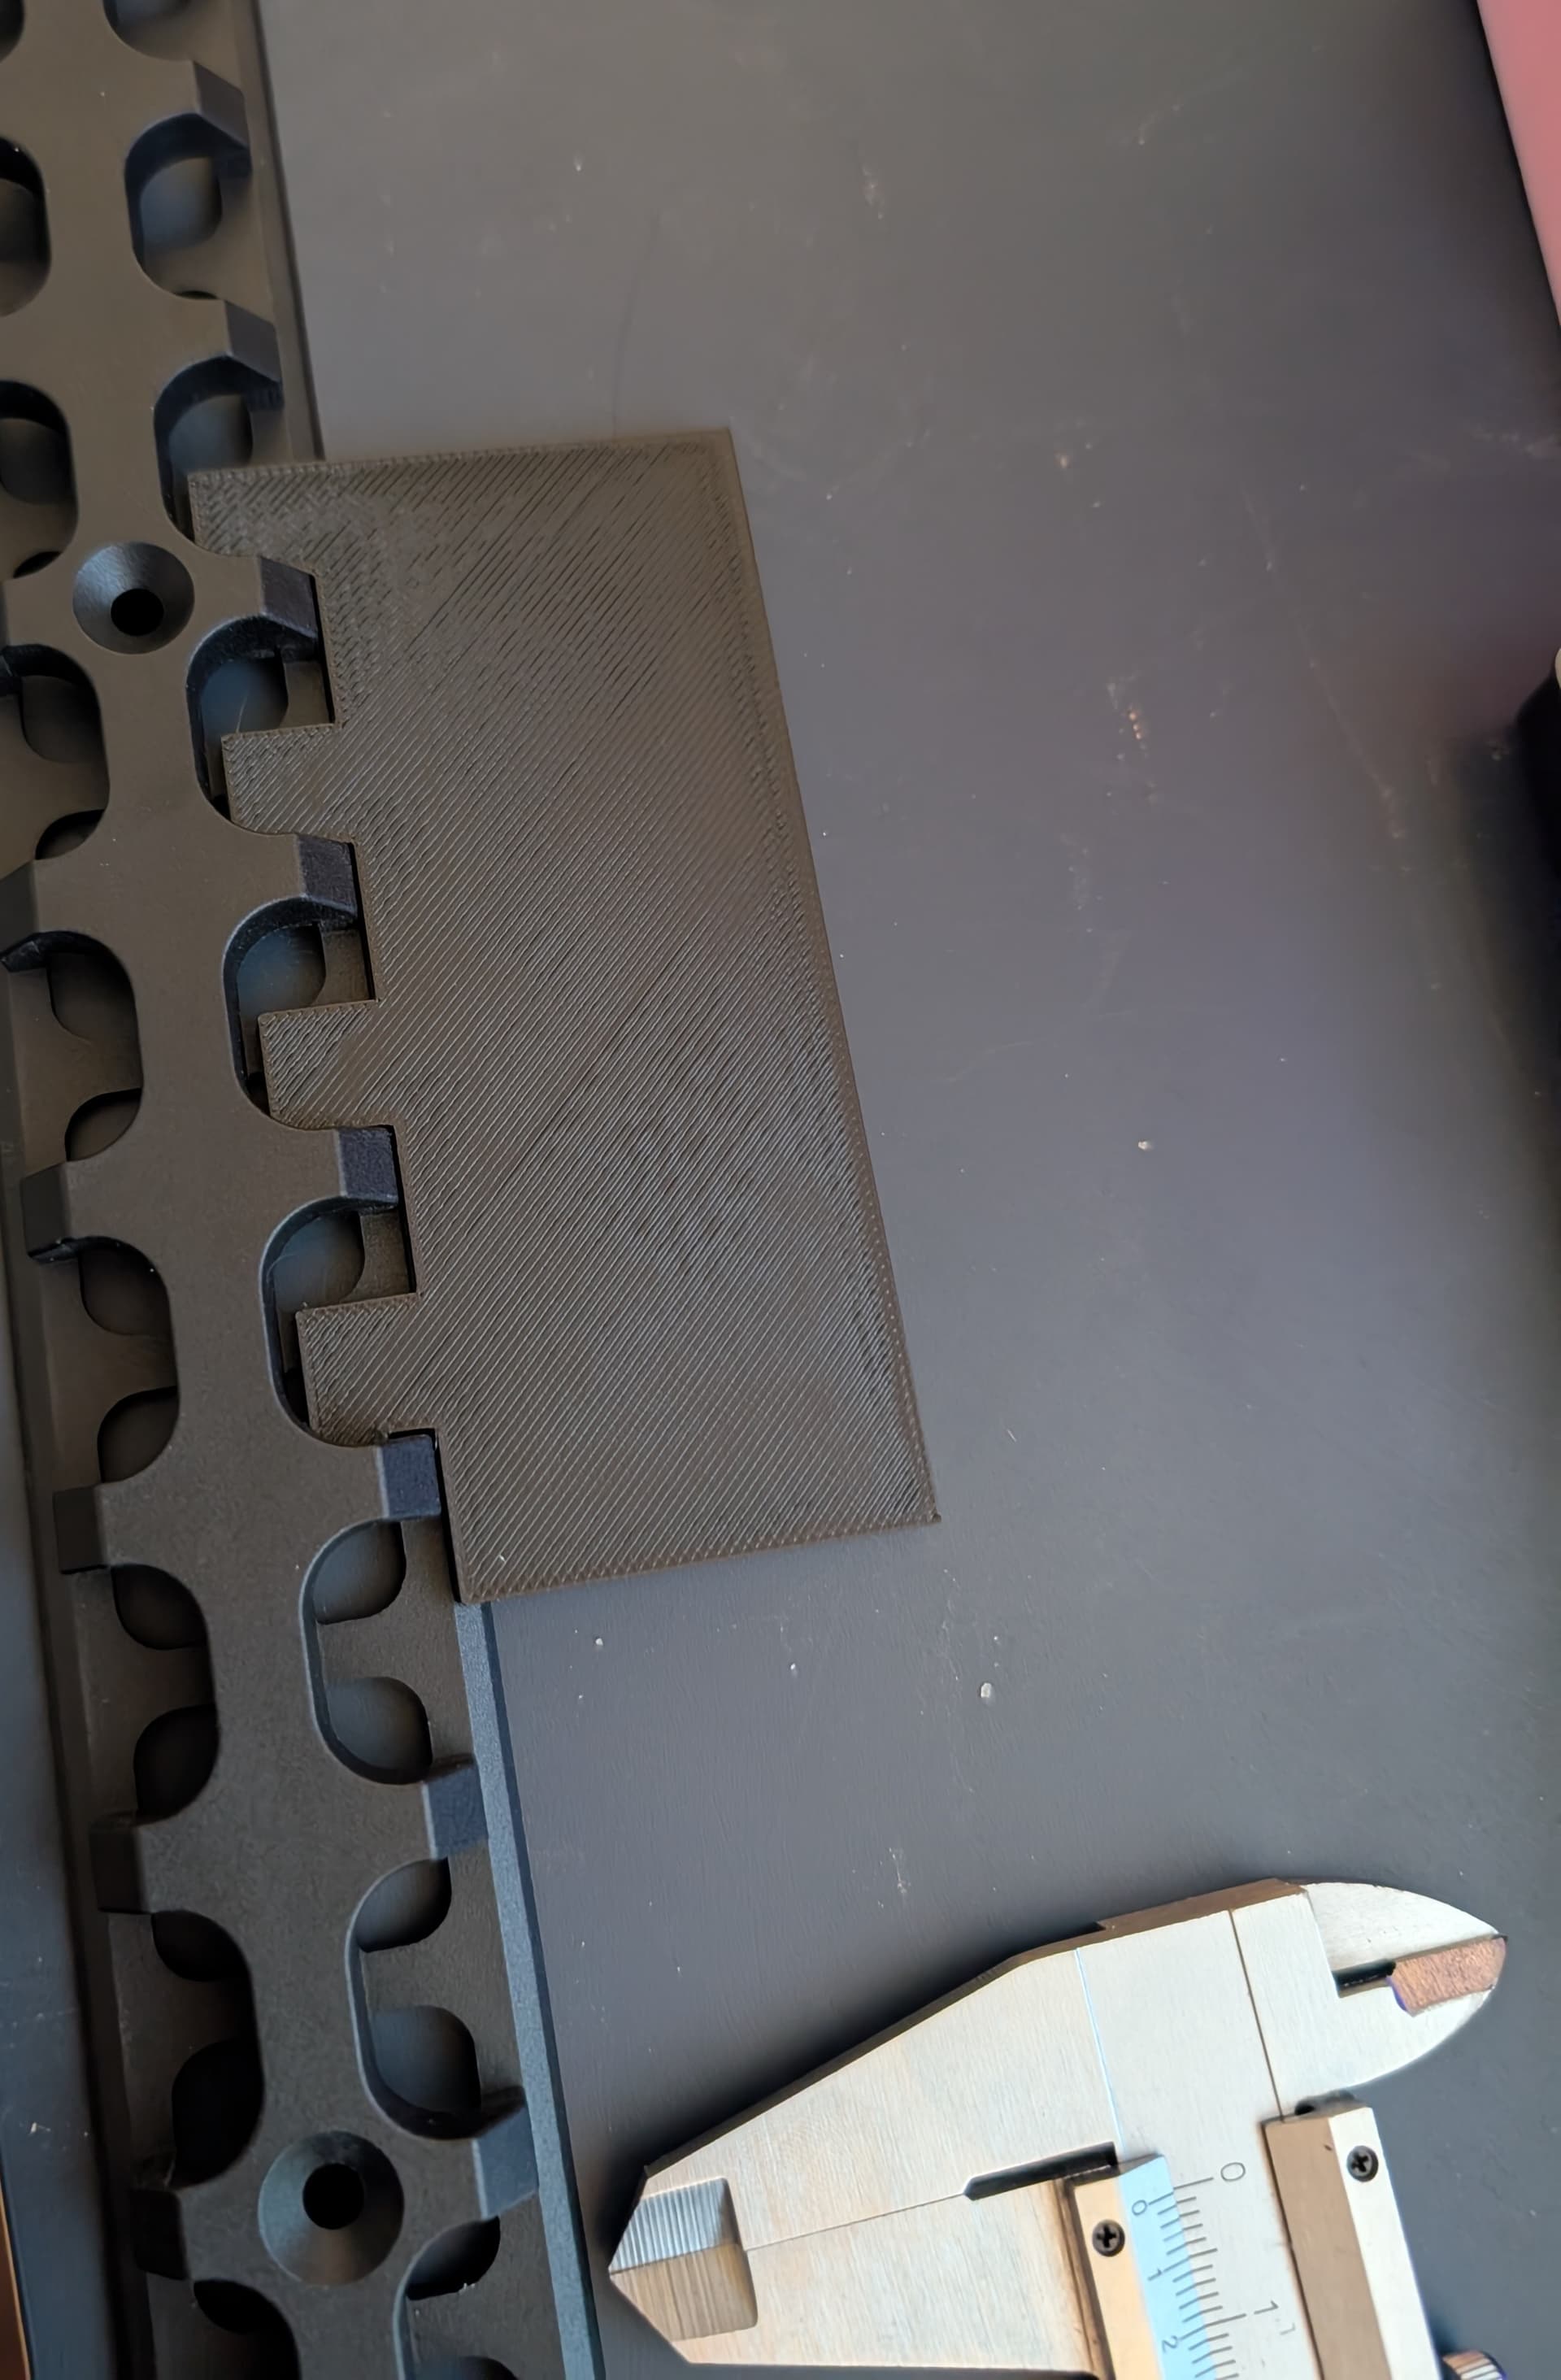
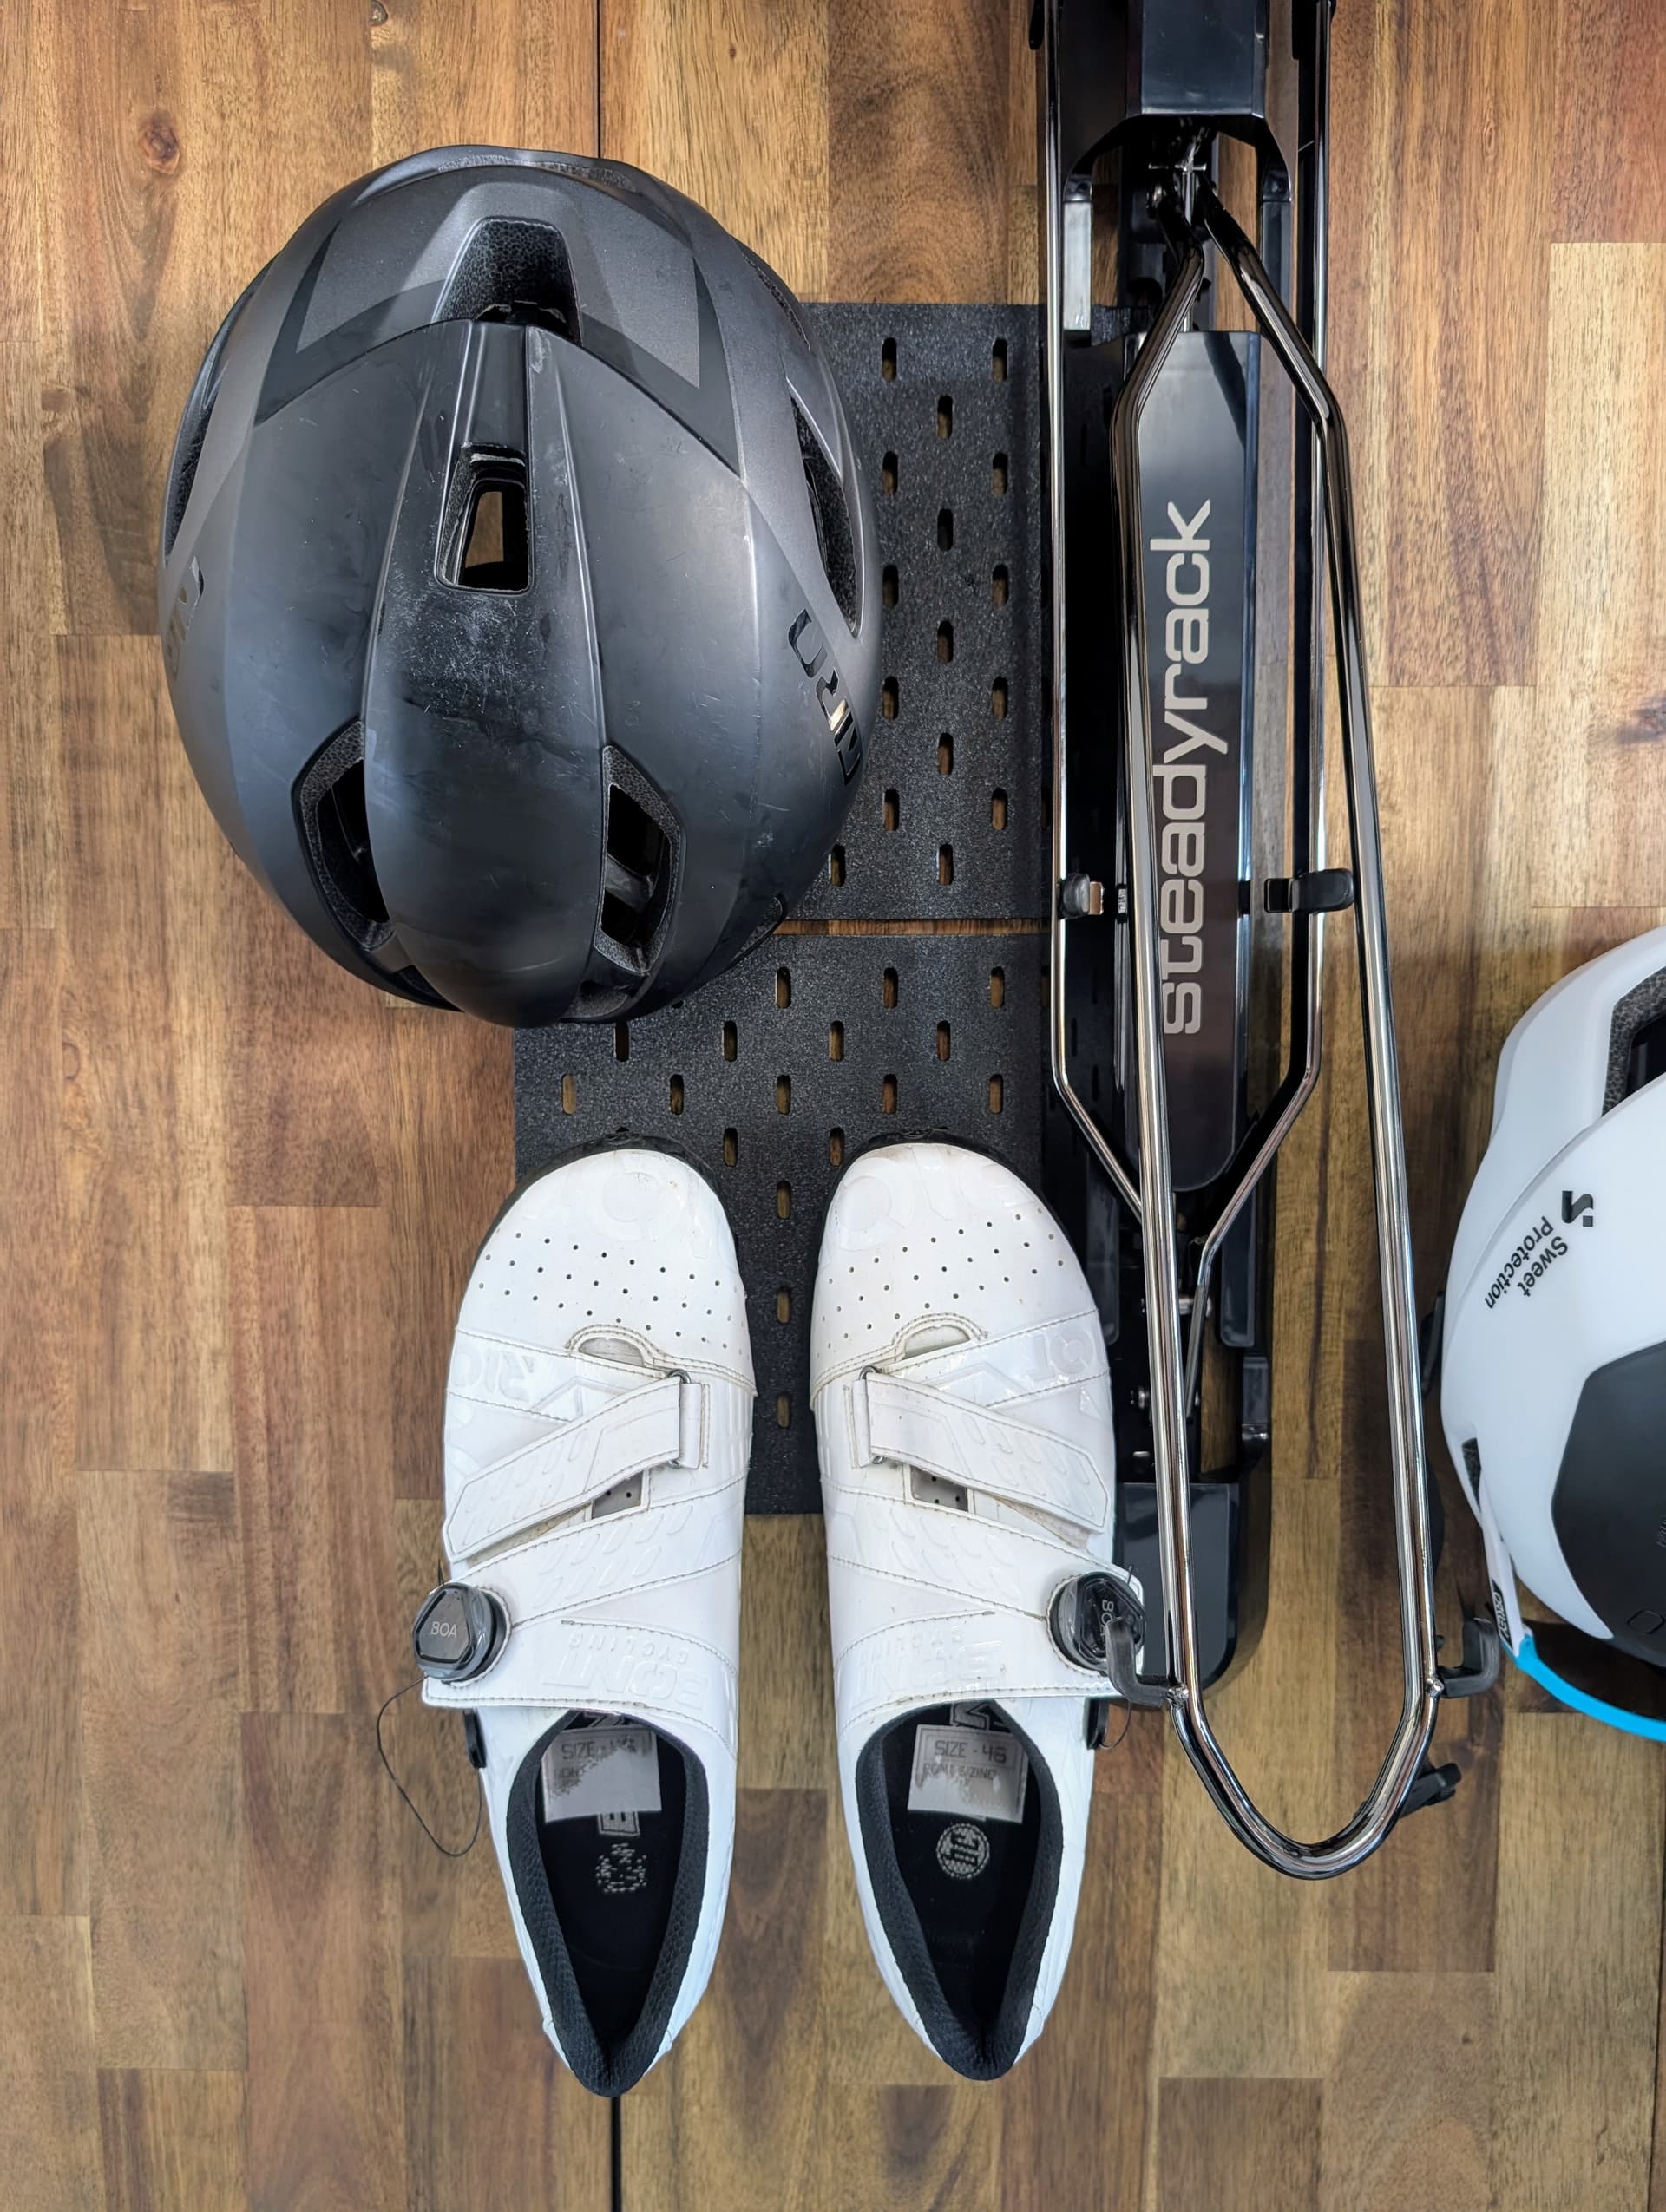
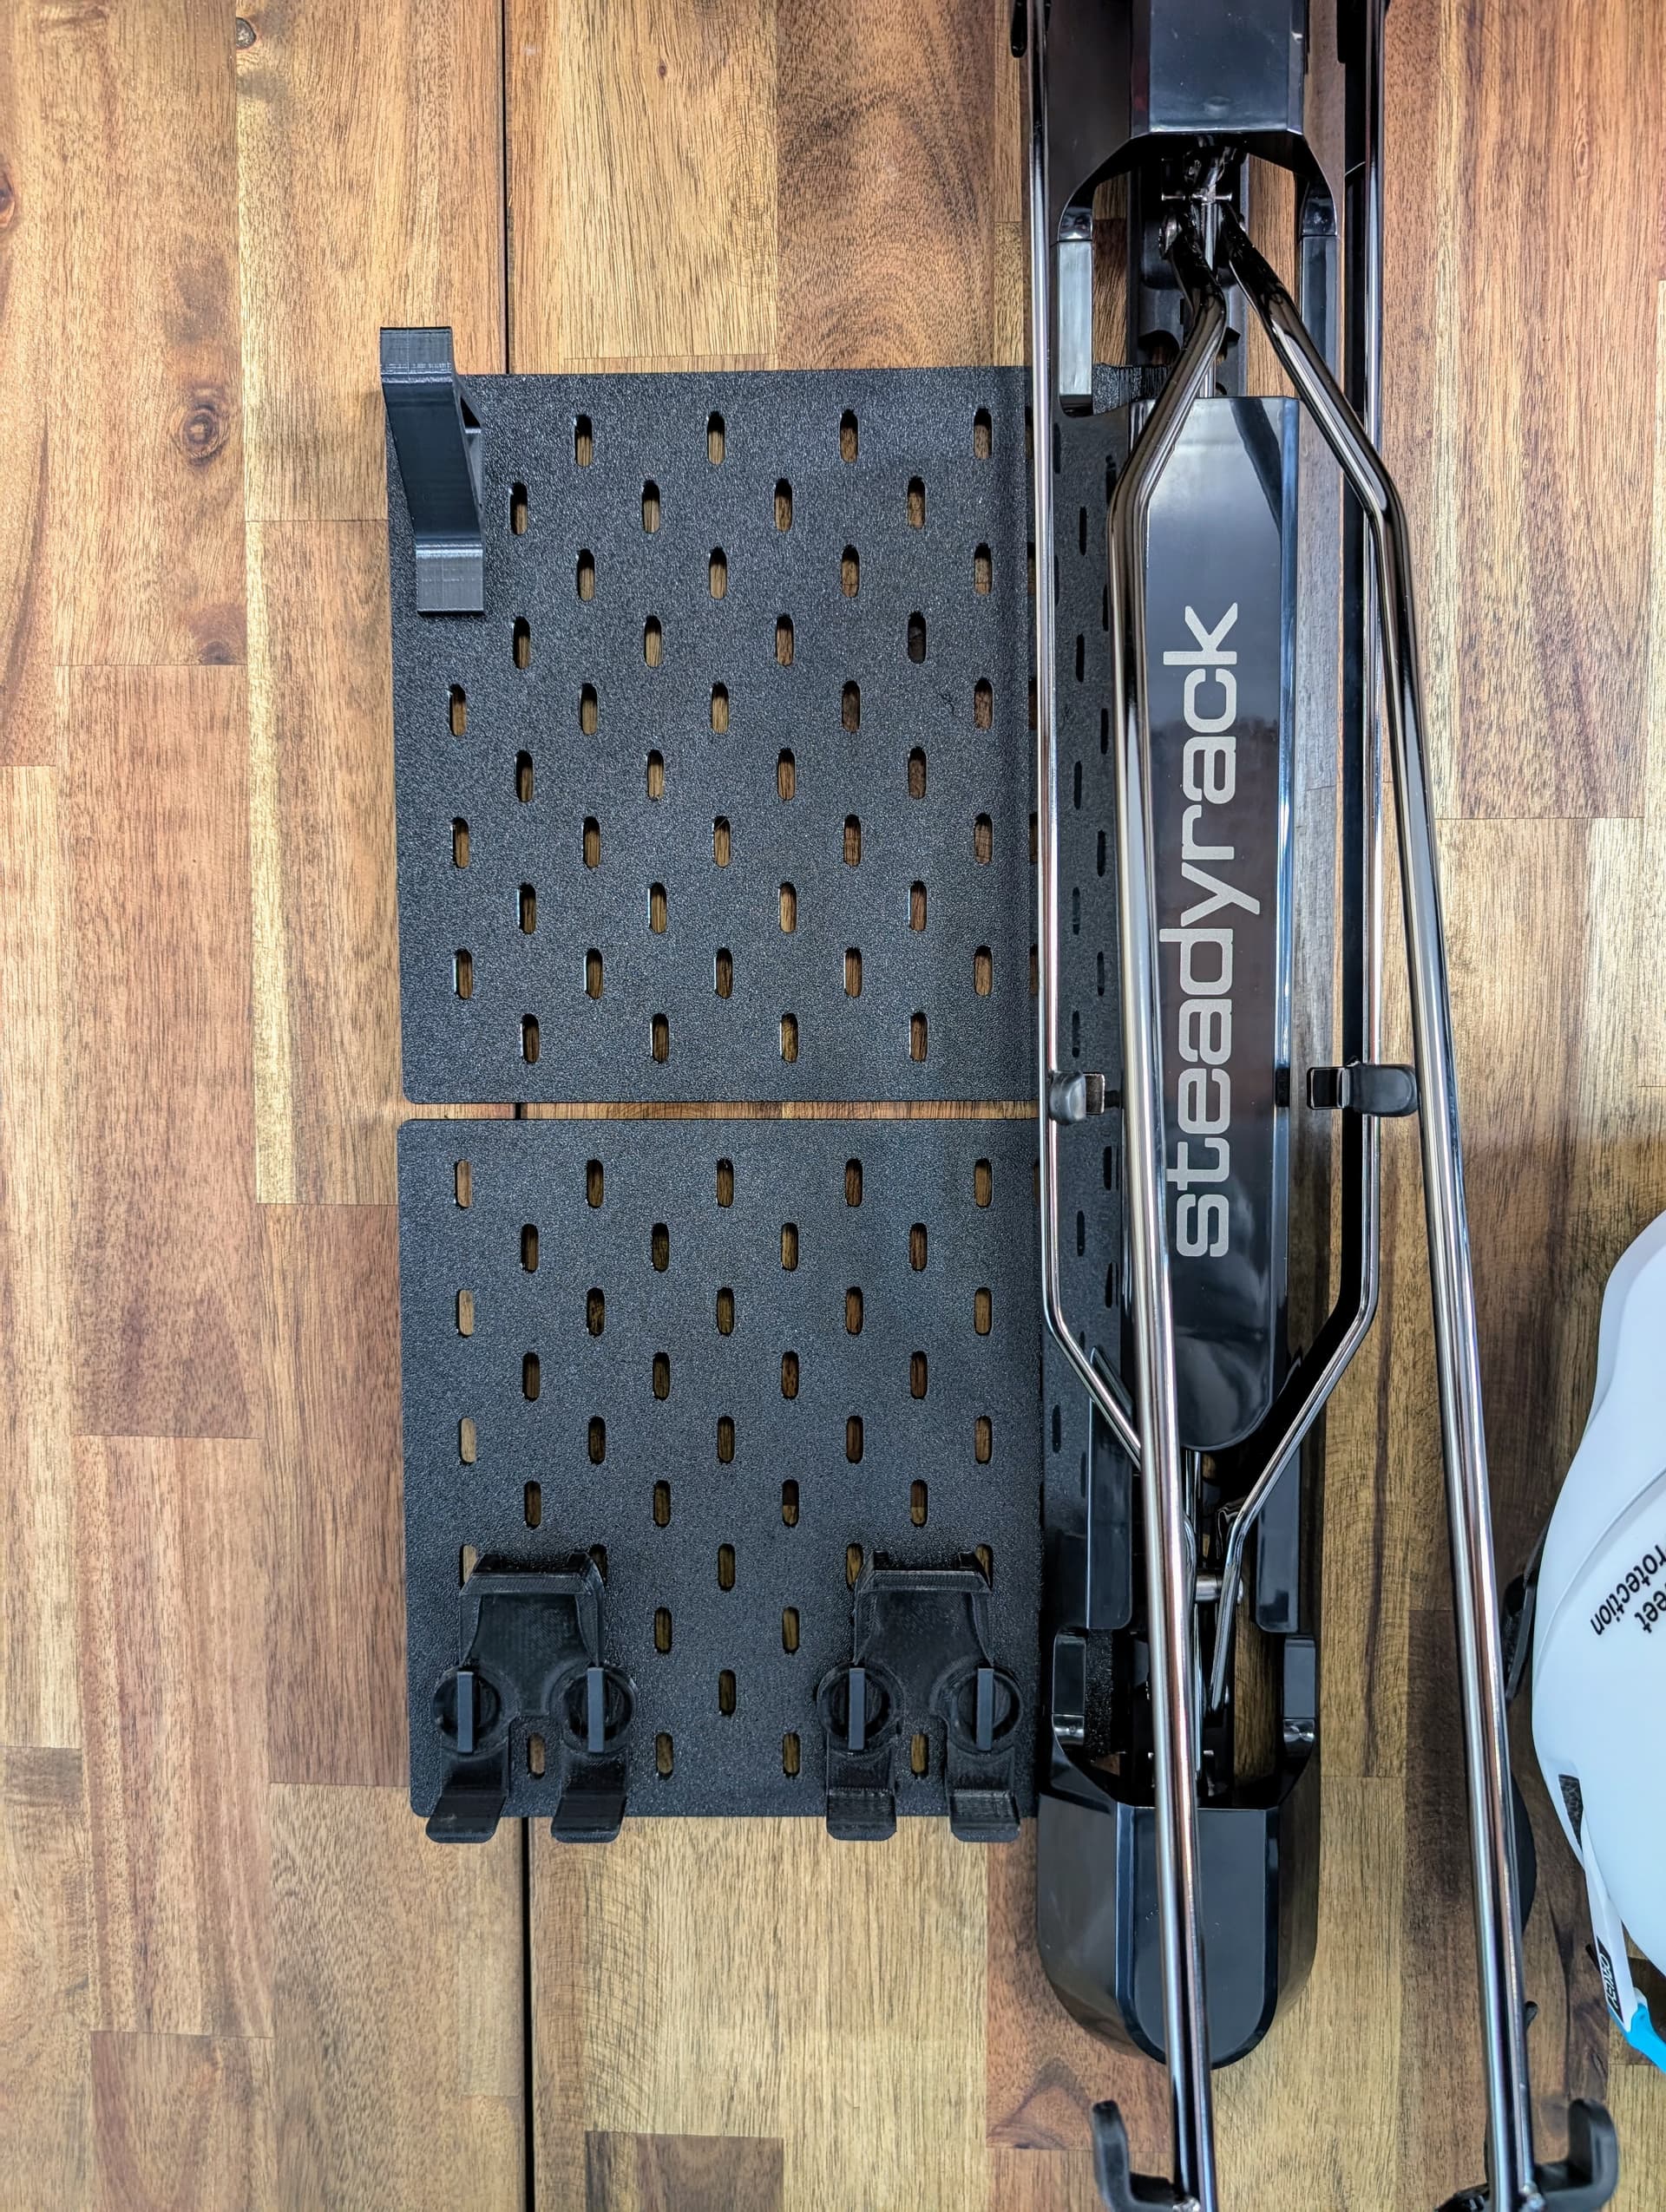
I have the Steadyrack system in my garage for bike storage, wasn’t really a fan on their Gearmate system, especially for the price
Decided to remix an IKEA Skadis style pegboard to suit, that way I can add whatever I want/need such as hooks for helmet/ shoe storage, charging stations and spare batteries etc
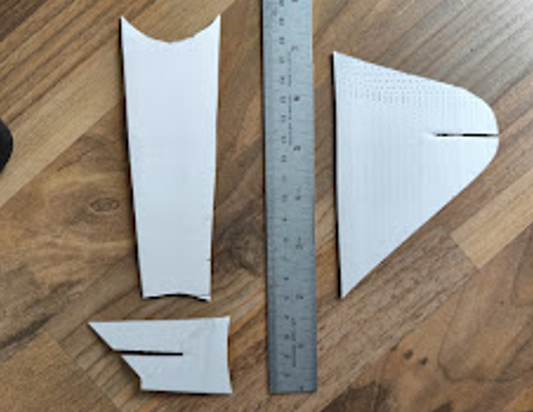
I think creating a simple cardboard template of the bottom bracket curvature along the central plane of the frame and trace the outline of the opening with a pencil and paper should work well enough to create something for 3D printing.
Flatten out the traced outline, take a picture of the cardboard template and your traced cover with a ruler or something in the picture for scale and import the image to CAD.
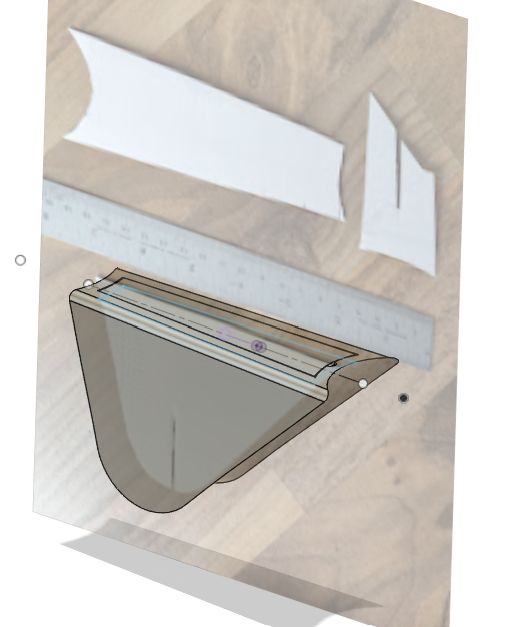
Scale the image and then you can create a curve to match the bottom bracket by tracing the cardboard cutout. Create another sketch that uses the stencil you created and then just project the stencil onto the bottom bracket curvature. If you use some sort of mark to show where the cover aligns with the seat tube or similar that can be added to your curve and cover template, it should get you in the right area.
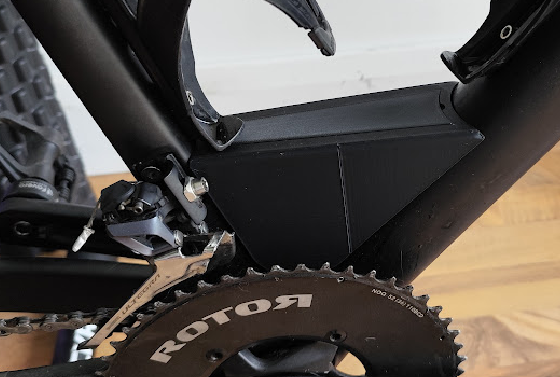
I’ve used a similar approach to design a small integrated box for tools on a frame I have. It still needs some tweaks but the same approach could easily be used to create a simple plastic cover for the bottom bracket.
Hope this helps.
3 Likes
Thanks Dylan, that’s helpful about process.
I’ve created a cut-out plastic version that I taped in place for a race. And that showed that there’s a fair bit of tweaking to do to get the shape right in the template first. I put a layer of silicone around the edge, too, to try and create a seal that would tighten against the frame.
The plastic was from a soft-drink bottle - so flexible. And I glued a thin layer of eva foam on the inside as to give it rigidity and impact protection. But since it was flexible, the curve was not fixed. I used the horizontal circular curve of the bottle, which was tighter than the frame curve, so that it naturally held itself with the frame curve once in place.
The cardboard template will be a good next step to get the dimensions and curve more exact.
Added a few bits I found on printables today
I will probably move them to the side at some point, it’s not the most practical place to store shoes and helmets
1 Like
How powerful does a computer need to be to run a 3D printer? I have a cheap laptop in the workshop that I use to run the Di2 e-tube software and create vinyl cutting files for decals and spray masks, but I’m not sure it has the grunt to run a 3D printer.
The 3d printer runs itself, it’s more about slicing the file to be printed, which can be resource intensive for a complicated print
1 Like
The shoe clip is interesting - does it have a lip to hold the forward edge of the cleat?
CMH is the goat of 3d printed bike stuff - he’s been mentioned on the podcast, like a million times and is/was a member.
A recent 3D hack I printed was these feet for my Kickr Core. They do make a difference I think.
3 Likes
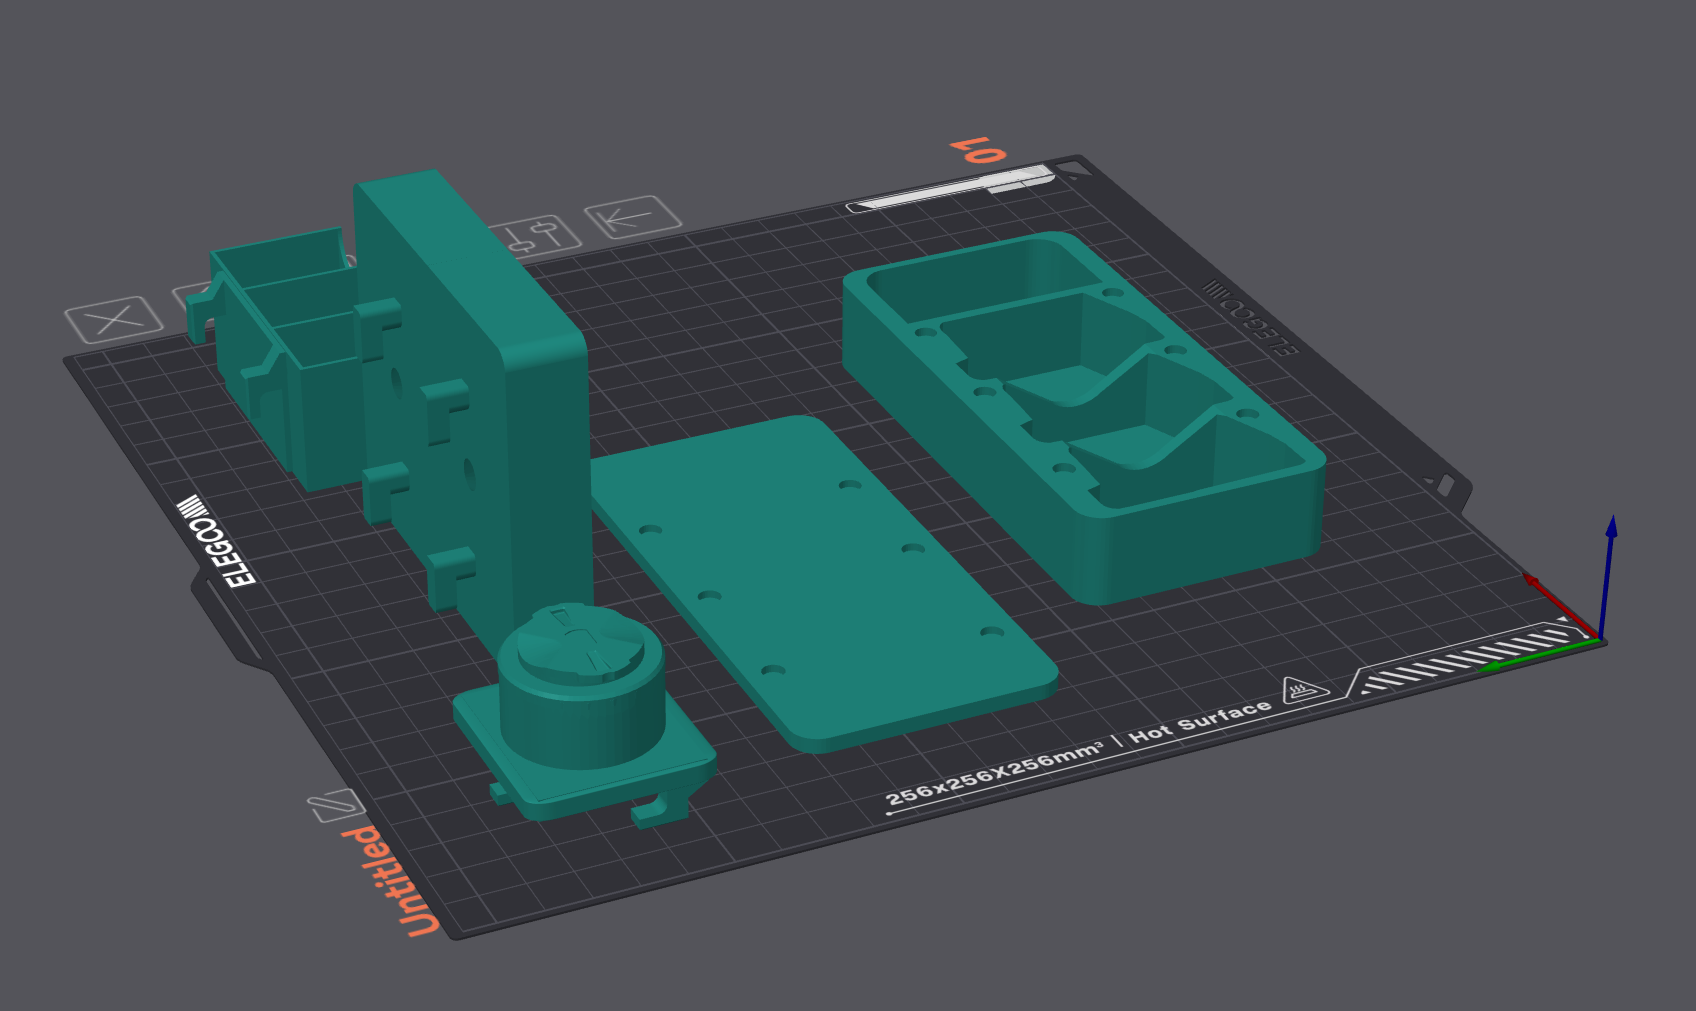
Currently printing: etap 2x charger mount, garmin mount, etap battery mount and a spare battery box for travelling
Modified the garmin mount and the battery storage mount with the Skadis pegboard legs
1 Like
Hi Drew,
Did some digging and created an STL:
Now you just need to find someone to print it. I would recommend some toughened material (ASA, ABS, PETG), but PLA could work too. SLS would be ideal, but pricey.
Cheers,
Richard
1 Like
@Drew_Duns I have some ASA, ABS and PETG here and can post it up to you if you cant find anyone on the coast
1 Like
So, question: I have a birthday coming up and my wife is hassling me for gift ideas. It just occurred to me that a 3D printer could be a good one.
It looks like the Creality Ender-3 v3 can be had for a just-about-acceptable price with some filament - is that going to be a good enough place to start, or am I at risk of: “yeah it’s ok, but I should have spent more”?
If I need to spend more then it’s probably off the table. I doubt I’m going to be a big user (partly because of my fears around the performance of the laptop I’d likely use to run it, which I categorically will not be replacing), but if it is good enough and the laptop will run it, then it seems like an acceptable idea.
Verdict? Other options I should be looking at? Anything cheaper that’ll do as good a job?
1 Like
Is the laptop the only computer in the house? Hard to really advise which printer to buy because I don’t know what UK pricing is like
I’m in Sydney, just FYI.
It’s not the only computer, but it is the only PC. I have 2 Macs, but I was guessing that I’d need to use a PC - if I’m wrong on that then I’m happy to be corrected!
Looks like the Mac will be fine to run a Creality product
I would also look at the Bambu A1 Bambu Lab A1 | Multi-color 3D Printer | Bambu Lab AU Store